
I have wanted to build a serious homelab for a long time, not just as a hobby shelf project but as a real platform for learning infrastructure properly. I wanted a lab I could break, rebuild, automate, and trust. The Raspberry Pi was the perfect starting point because it is affordable, low power, flexible, and honest: if your design is bad, the Pi will expose it quickly.
This post is the full journey so far, from first hardware assembly to designing for Proxmox-style virtualization workflows and planning a Ceph-backed storage layer. It is intentionally long because real infrastructure work is never just one command. It is dozens of small decisions that compound into reliability.
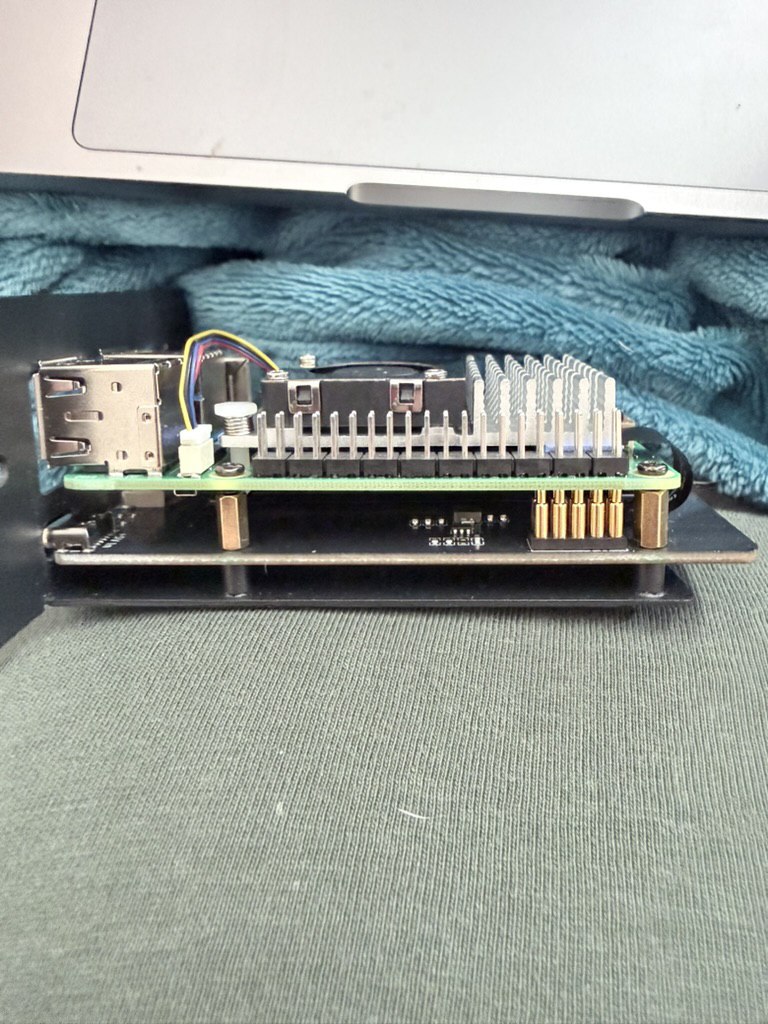
My first phase was mechanical and thermal, not software. Before installing anything, I focused on airflow, cooling, and physical stability. In small form-factor builds, temperature and connector stress are not details. They are architecture. If your board throttles under sustained load, your benchmark numbers are fake confidence.
I started by fitting a proper heatsink and fan setup and validating that the board had enough breathing room. Cable routing also mattered more than expected. Poor cable paths can create tiny intermittent issues: loose connectors, accidental pressure points, or vibration over time. Getting this right early prevented future ghost problems.
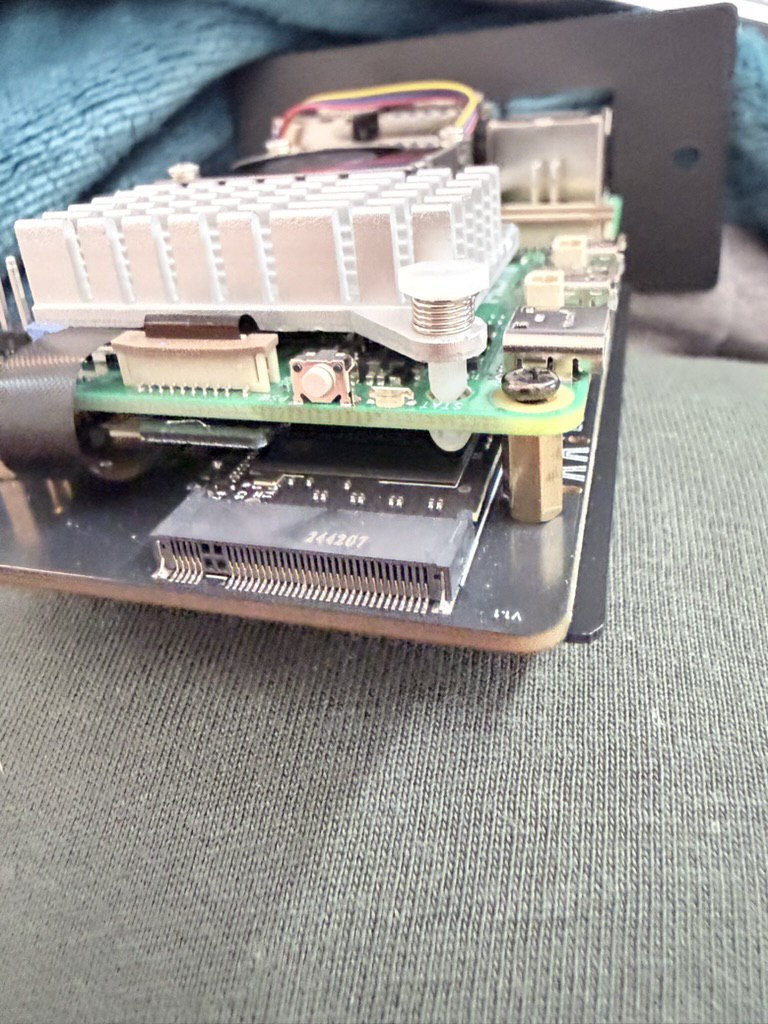
Once cooling and structure looked stable, I moved to expansion planning. A Pi homelab gets serious when you move beyond SD-card mindset. For anything virtualization-like, persistent and resilient storage is mandatory. That meant planning around PCIe/SATA expansion and testing real throughput and thermal behavior together.
Storage on Pi is where ambition meets physics. You can attach fast devices, but controller quality, power delivery, and sustained thermal conditions decide whether the setup is production-like or just a demo. I tested with the mindset that consistency matters more than peak speed screenshots.
At this point, the project stopped being a single-device experiment and became a node strategy question: what am I actually building toward? My answer was clear: a clustered environment where I can practice Proxmox workflows, distributed storage concepts, and service operations under realistic constraints.
Now, a quick reality check: native Proxmox VE support on Raspberry Pi is not the default path most people take, and ARM introduces caveats compared to typical x86 homelab guides. But the value for me is not pretending this is a turnkey enterprise clone. The value is learning cluster fundamentals deeply: networking, storage behavior, orchestration discipline, backup strategy, and failure handling.
So I treated Proxmox as a design target and operational model: node management standards, VM/container thinking, role separation, and automation mindset. Even when tooling differs per architecture, the engineering principles still transfer. That has been one of the biggest lessons in this build.
Networking was the next big focus. Lab networking is where many projects get unstable quietly. I documented addressing, reserved node identities, and isolated management from service traffic as much as practical in my home setup. It is tempting to skip this when excited, but clean network planning pays back every single day.
Once the base stack started to take shape, I began planning Ceph. Ceph is one of those technologies that teaches humility quickly. On paper, distributed storage sounds like a feature. In practice, it is a discipline: monitor quorum, replication strategy, OSD health, placement groups, latency sensitivity, and recovery behavior all matter.
For a Pi homelab, Ceph is less about maximizing IOPS and more about understanding the system model. I wanted to learn the operational muscle memory: what healthy looks like, what degraded looks like, how rebalancing behaves, and how topology choices impact resilience.
I designed with the assumption that hardware limits are real and should be respected. That means setting expectations correctly: this is not meant to outgun enterprise SAN hardware. It is meant to become a reliable personal platform for experimentation, learning, and service hosting with clear observability.
Ceph planning also forced me to think about node count and failure domains properly. Replication factors are not abstract numbers when you only have a small cluster. Every decision has capacity and availability trade-offs. I spent time modeling these trade-offs before committing blindly to defaults.
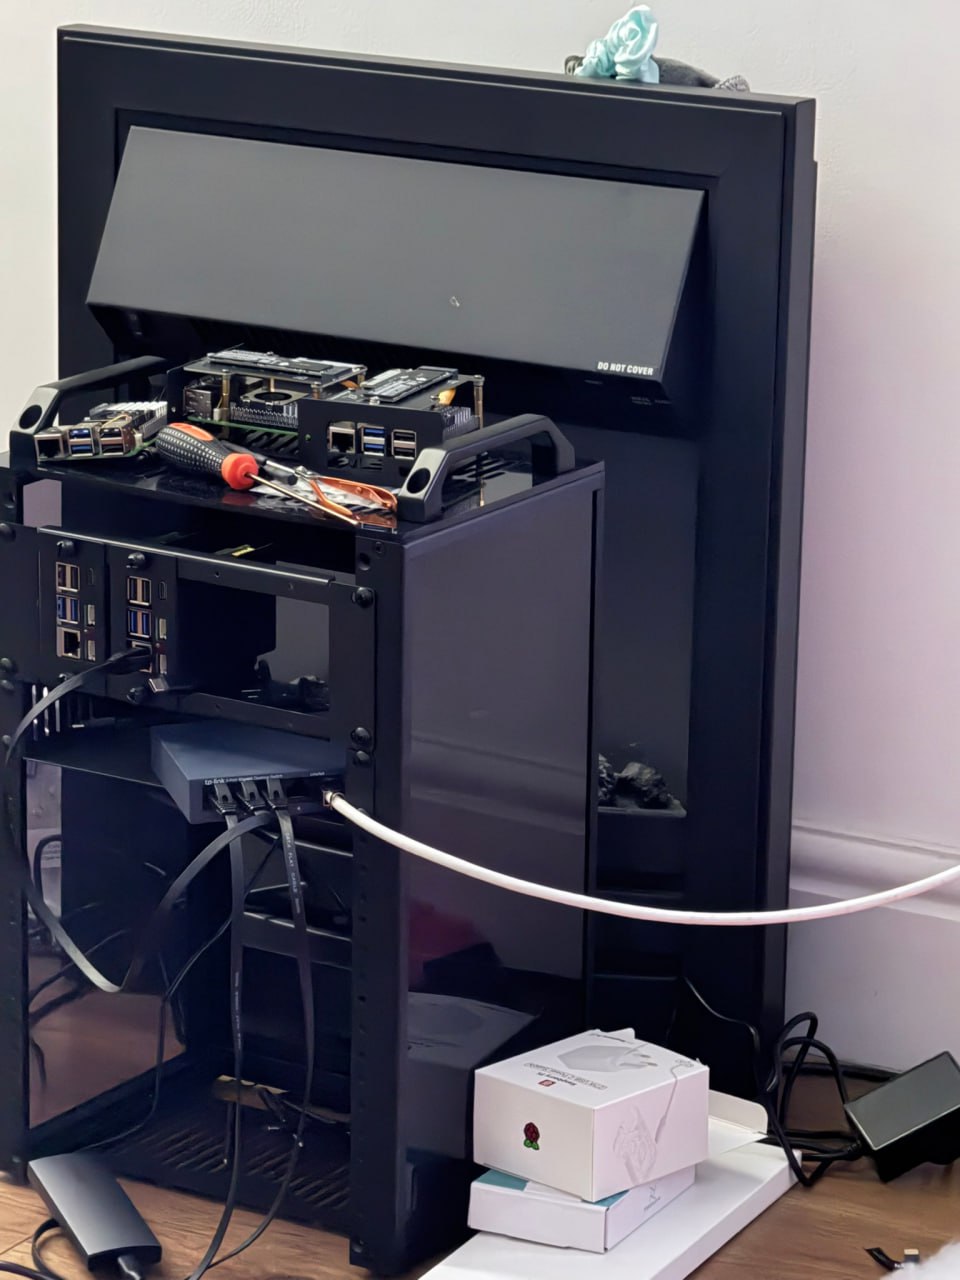
Meanwhile, the rack itself evolved from a temporary bench arrangement to a more intentional setup. I moved from 'it boots' to 'it can be operated'. That shift included easier physical access, cleaner cable discipline, and better room for future node additions and maintenance.
Power and thermals remained continuous checkpoints. Small SBC clusters can run surprisingly warm when doing sustained I/O and compute. I tracked stability under load and adjusted placement and cooling assumptions as the system matured. The goal was boring stability — boring is beautiful in infrastructure.
With the platform maturing, my software goals became clearer too: run internal services, test CI/CD patterns, host personal automation, and keep pushing reliability standards. A homelab is most valuable when it is not just infrastructure for infrastructure’s sake, but a daily-use environment that pressures your design choices.
One of the underrated wins in this project has been operational confidence. Every time I troubleshoot a boot issue, performance bottleneck, networking mistake, or storage quirk, I improve instincts that transfer directly to production engineering work. Homelabs are where theory becomes muscle memory.
I also learned that documentation is part of the build, not an afterthought. I keep notes on wiring choices, storage mappings, service assumptions, and known-good configurations. Without this, every rebuild becomes archaeology. With it, iteration becomes fast and repeatable.
Another strong lesson: incremental architecture beats grand design. I did not try to build the perfect final state on day one. I built a stable base, validated each layer, then expanded. That approach prevented expensive rewrites and made each step understandable when something went wrong.
The photos in this post show that progression clearly: first cooling and board prep, then profile and connector checks, then storage expansion detail, then actual rack progress. It is a reminder that serious systems are built one grounded step at a time.
Where this is heading next: tightening cluster automation, refining backup and restore drills, expanding observability dashboards, and continuing the Ceph journey with realistic performance expectations. I want this lab to be a place where I can test ideas with confidence before they touch anything critical.
If you are thinking about starting your own Pi homelab, my advice is simple: start small, design for reliability early, and document everything. Hardware glamour is fun, but resilience comes from discipline. If you can make a constrained platform dependable, you become a better engineer everywhere.
This build is still in progress, and that is exactly why I enjoy it. A homelab is not a finished object. It is a living system and a learning loop. From Proxmox-style cluster thinking to Ceph fundamentals, this journey has already taught me more than many purely theoretical courses ever could.